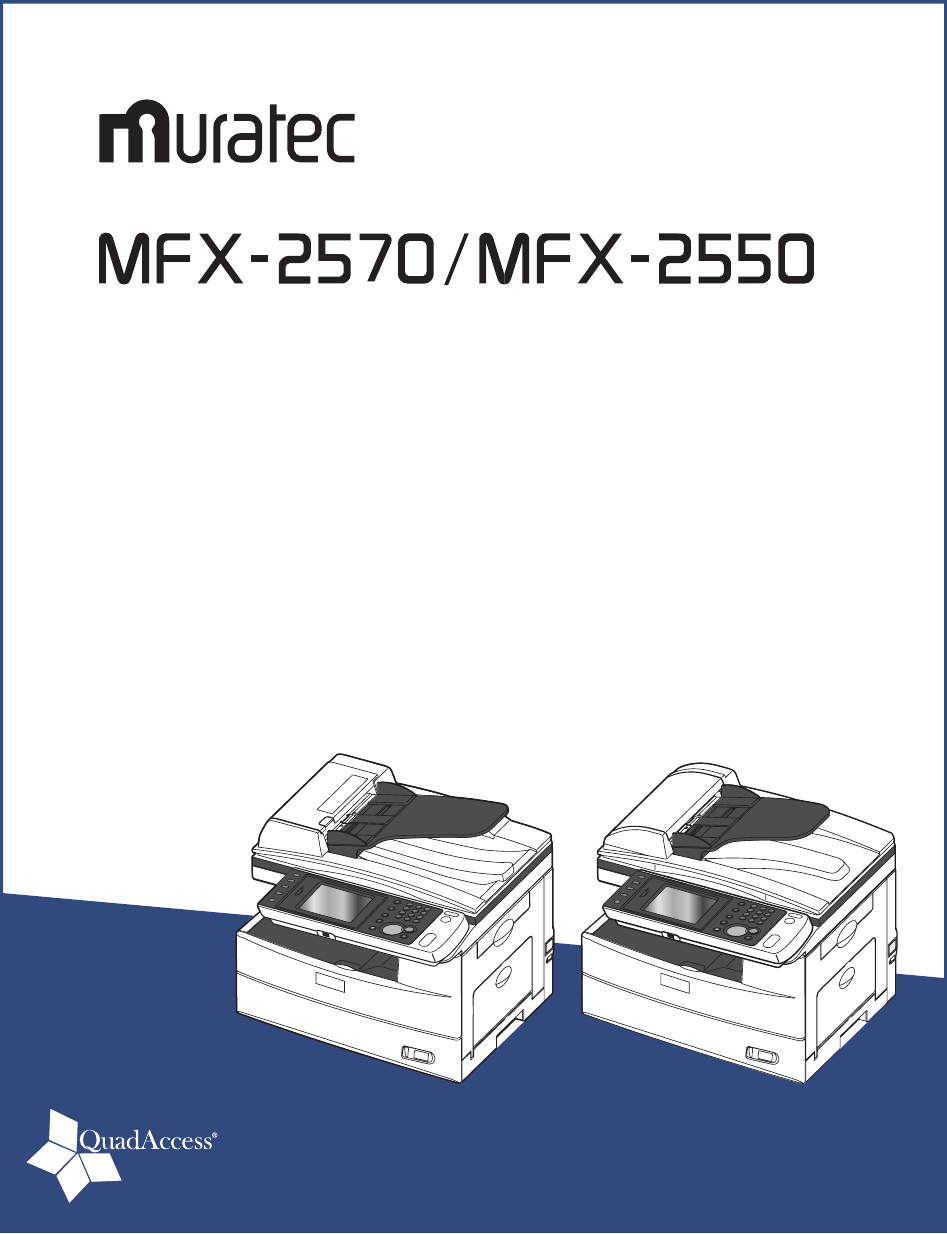
Muratec MFX-2550 User Manual
Browse online or download User Manual for Printers Muratec MFX-2550. Muratec MFX-2550 User Manual
- Page / 129
- Table of contents
- TROUBLESHOOTING
- BOOKMARKS
- User’s Guide 1
- Introduction 2
- Regulatory information 3
- ENERGY STAR 4
- QuadAccess 5
- Trademarks 5
- Limited warranty 6
- How to Read This Manual 8
- Key Descriptions 10
- Precaution 11
- Space Requirements 12
- Operation Precautions 13
- Precaution xiii 14
- Caution Labels and Indicators 15
- Ventilation 15
- For California, USA only 16
- Battery 16
- Contents 17
- Chapter 3 Registration 18
- Chapter 4 Maintenance 18
- Chapter 5 Troubleshooting 19
- Chapter 6 Specifications 19
- Overview of Manuals 20
- Chapter 1 22
- Part Names and Functions 23
- Overview of the OfficeBridge 26
- Control Panel 27
- Operation Screens 29
- 1-10 Operation Screens 31
- My MFP Screen 32
- Connection and Main Settings 33
- Adjusting the Screen Contrast 35
- Setting the Language 35
- Press [User Install] 36
- Press [Language] 36
- Setting the Date and Time 37
- Press <Setting> 38
- Press [Management] 38
- Press [Network Settings] 38
- Press [TCP/IP Settings] 38
- Press [IP Address] 40
- Press [Subnet Mask] 40
- Turning the Power ON and OFF 41
- Turning the Power OFF 42
- Loading Paper 44
- Items to Avoid 45
- Printable Area 45
- Cautions When Loading Paper 46
- 1-26 Loading Paper 47
- Close the paper cassette 48
- Set the paper size 48
- 1-28 Loading Paper 49
- Setting the Paper Size 50
- 1-30 Loading Paper 51
- Loading Documents 52
- Scanning Area 53
- Lift up the platen cover 54
- 1-34 Loading Documents 55
- Chapter 2 56
- Making Copies 57
- Duplex Copying 58
- Operating the Machine 60
- 2-6 Making Copies 61
- Scanning 62
- Press [Mail Address] 63
- Press <Start> 63
- Press the [e-mail] tab 64
- Specify the destination 64
- Manually Specifying a Folder 65
- Specify the folder shortcut 66
- Scanning to an FTP Server 67
- Press [Host] 68
- Press [Link] 68
- Press [UserName] 68
- 2-14 Scanning 69
- Scanning to USB Memory 70
- 2-18 Scanning 73
- Transmitting Faxes 74
- Canceling Faxes 76
- Transmitting PC Faxes 77
- 2-24 Transmitting Faxes 79
- Click [Send] 80
- 2-26 Transmitting Faxes 81
- Offramp Transmission 83
- Printing 84
- 2-30 Printing 85
- Chapter 3 86
- Registering Destinations 87
- Press a new button 88
- Press [Fax No.] 88
- Press [Enter] 90
- Registering Folder Shortcuts 91
- Press [Shortcut Name] 92
- List of Settings 94
- 3-10 List of Settings 95
- [Default Settings] Screen 96
- [Management] Screen 97
- Registration 98
- [Paper Settings] Screen 99
- [List] Screen 100
- [Personal Settings] Screen 101
- Chapter 4 102
- Replacing the Toner Cartridge 103
- Maintenance 104
- Replacing the Drum Cartridge 105
- Replacing the Stamp 107
- Put the removed 108
- Cleaning the Printer 109
- Chapter 5 110
- Document Jams 111
- Jam in the Document Feeder 112
- MFX-2550 Users 113
- Open the platen cover 114
- Close the platen cover 114
- Paper Jams 115
- Troubleshooting 116
- 5-8 Paper Jams 117
- 5-10 Alarms 119
- IMPORTANT 119
- Chapter 6 120
- Specifications 121
- Printer Specifications 122
- Scanner Specifications 122
- Fax Specifications 123
- Copy Specifications 123
- Printer Driver Specifications 124
- Fax Driver 125
- Specifications 125
- Scanner Driver Specifications 125
- External Dimensions 127
- MFX-2550 128
Summary of Contents
ENG© 2010 MURATA MACHINERY, LTD. Printed in China 2010-02Part Number: DC4-90440-60MAI Order Number: OMMFX25503301 East Plano Parkway, Suite 100Plano
1How to Read This Manual ixKey DescriptionsIn this manual, the operating keys are described as follows:The key names on the control panel are shown
123RegistrationList of Settings 3-15[List] ScreenYou can print various lists.AddressPrints a list of the destinations registered in the address boo
3-16 List of SettingsF-Code Box ListPrints a list of the registered F-Code boxes.Refer to Chapter 4, “F-Code Communications” in the Scanner and Fa
Chapter 4MaintenanceReplacing the Toner Cartridge ...4-2Replacing the Drum
4-2 Replacing the Toner CartridgeReplacing the Toner CartridgeWhen the toner runs out, the machine will display “Toner should be replaced” and will
1234MaintenanceReplacing the Toner Cartridge 4-3Unpack the toner cartridge from its carton. Then, holding the toner cartridge 4 with both hands, ge
4-4 Replacing the Drum CartridgeReplacing the Drum CartridgeWhen the drum is near the end of life, the machine will display the message “The drum i
1234MaintenanceReplacing the Drum Cartridge 4-5Pull the used drum cartridge out.3 Unpack the new drum cartridge from its carton and slide it into t
4-6 Replacing the StampReplacing the StampNoteThe stamp function is optional for MFX-2570 only.• Do not directly touch the stamp surface. If the in
1234MaintenanceReplacing the Stamp 4-7Put the removed 4 cap on the used stamp, and remove the used stamp.If you cannot pull out the stamp, use tool
4-8 Cleaning the PrinterCleaning the PrinterCleaning the Drum Charge Wire and the Print HeadWhen the following message is displayed, or you are exp
x PrecautionPrecautionBesides the “Safety Information” supplied with this product, please observe the following instructions.Installation Precautio
Chapter 5TroubleshootingDocument Jams...5-2Jam
5-2 Document JamsDocument JamsIf a document jams in the ADF (automatic document feeder), the following message will appear.NoteTo prevent document
12345TroubleshootingDocument Jams 5-3Jam in the Document FeederMFX-2570 Users Open the ADF cover.1 Open the inner cover.2 Gently remove the docume
5-4 Document JamsMFX-2550 Users Open the ADF cover.1 Gently remove the document from the ADF. If you cannot remove it, turn the 2 release knob to
12345TroubleshootingDocument Jams 5-5Document Jammed in the Feed AreaOpen the platen cover.1 Open the ADF cover and turn the release knob to remove
5-6 Paper JamsPaper JamsIf a paper jam occurs, the following message will appear.If a paper jam occurs during fax reception, the machine will store
12345TroubleshootingPaper Jams 5-7If paper is jammed in the paper supply area, remove the jammed paper.2 If paper is jammed in a paper cassette, op
5-8 Paper JamsIf paper is jammed in the paper output area, slowly remove the jammed paper 5 from the paper output side.Close the side cover and pap
12345TroubleshootingAlarms 5-9AlarmsWhen a transmission error occurs, or there is a problem with the machine, the information lamp will illuminate,
5-10 AlarmsIf you cannot solve the problemIf you have a problem with your machine that you cannot solve with the information provided in this chapt
1Precaution xiSpace Requirements CautionDo not let any object obstruct or plug the ventilation holes of this product. Accumulated heat inside the
Chapter 6SpecificationsSpecifications ...6-2G
6-2 SpecificationsSpecificationsPlease note that the product specifications and appearance are subject to change without notice.GeneralBasic Specificat
123456SpecificationsSpecifications 6-3Printer Specifications Item SpecificationsPhotoreceptor type OPC drumPrinting method Dry electric photographic r
6-4 SpecificationsFax Specifications Item SpecificationsScanline densityUltra-high resolution mode:High resolution mode:Standard mode:Main scanner 60
123456SpecificationsSpecifications 6-5Printer Driver Specifications Item SpecificationsPrinter Language GDIOption:PCL 5e, PCL XL, XPS, PostScrip 3, PD
6-6 SpecificationsFax Driver *1 SpecificationsItem SpecificationsImage encoding method MMRResolution 600 × 600 (dots/inch)400 × 400 (dots/inch)200 ×
123456SpecificationsSpecifications 6-7OfficeBridge Specifications Item SpecificationsSupported browsers Internet Explorer® 6, Internet Explorer® 7, Int
6-8 SpecificationsOptions500-sheet 2nd cassetteItem SpecificationsPaper sizesLetter, Half-Letter, LegalPaper storage capacity 500 sheets (20-24 lbs.
123456SpecificationsSpecifications 6-9MFX-2550 13.8 in. (350 mm)20.5 in. (520 mm)15.4 in. (390 mm)0.4 in. (11 mm)17.6 in. (446 mm)18.1 in. (461 mm)0
6-10 SpecificationsIndexAAddress book registration ...3-2Administrator Password ...
xii PrecautionOperation PrecautionsIMPORTANTA negligible amount of ozone is generated during normal operation of this machine. • An unpleasant odor
1Precaution xiiiTransporting the Machine CautionBefore transporting the machine, be sure to check that you disconnect the plug from • the outlet a
xiv PrecautionCaution Labels and IndicatorsCautionThe area around the fuser unit becomes extremely hot during operation. Do not touch the area arou
1Precaution xvProduct Recycling and DisposalCautionThis product contains mercury.Disposal of mercury may be regulated due to environmental consider
xvi ContentsContentsIntroduction ...i
1Contents xviiLoading Paper into the Paper Cassettes ...1-26Loading Paper into the Bypas
xviii ContentsCleaning the Printer ...4-8Cleaning th
IntroductionThank you for choosing the MFX-2570 and MFX-2550.This User’s Guide describes the functions, operating procedures, and precautions for the
1Overview of Manuals xixOverview of ManualsThe instruction manuals for this product that describe the detailed operational and setting procedures a
xx Overview of Manuals
Chapter 1IntroductionPart Names and Functions ...1-2Overview of th
1-2 Part Names and FunctionsPart Names and Functions12367891011131245No. Name Description1 ADF cover Open this when a document jams and when cleani
1IntroductionPart Names and Functions 1-32122231415161718192024No. Name Description14 Platen cover This holds down the document.15 Document glass A
1-4 Part Names and Functions27282625No. Name Description25 Toner cartridge Load the toner cartridge here.26 Charge wire cleaning rod When the print
1IntroductionOverview of the OfficeBridge 1-5Overview of the OfficeBridgeWhen the machine is connected to the network, you can operate it using the W
1-6 Control PanelControl PanelMode keys1 Switches the machine to the Copier, Scanner, Fax and Printer mode.Display Contrast dial2 Adjusts the contr
1IntroductionControl Panel 1-7<Energy Save>12 Puts the machine into the energy save mode and reduces power consumption. (See page 1-22.)<S
1-8 Operation ScreensOperation ScreensYou can operate the machine by directly touching the keys and tabs on the touch screen.Ready ScreenYou can us
ii Regulatory informationRegulatory informationCustomer informationUnited States of AmericaThe MFX-2570 and MFX-2550 hereafter referred to as “prod
1IntroductionOperation Screens 1-9Copy Ready Screen Names and Functions Paper selection keySelects the cassette or tray containing the paper you w
1-10 Operation ScreensFax Ready Screen Names and Functions Shared/Personal displayDisplays whether the shared screen or personal screen is display
1IntroductionOperation Screens 1-11My MFP ScreenPress <My MFP> to switch to the My MFP screen. “Shortcuts” enable you to directly access func
1-12 Connection and Main SettingsConnection and Main SettingsConnecting the LAN CableAttach a ferrite core to the LAN cable.1 Make a loop near the
1IntroductionConnection and Main Settings 1-13Connect the modular cable to the telephone line jack, as indicated in the 2 diagram.Connecting an Ext
1-14 Connection and Main SettingsAdjusting the Screen ContrastYou can adjust the Display Contrast dial on the control panel to change the contrast
1IntroductionConnection and Main Settings 1-15If an administrator password is set, enter the password and press [Enter]3 .If an administrator passw
1-16 Connection and Main SettingsIf “7 The language was changed. Try to turn on power.” is displayed on the screen, turn off the machine power, and
1IntroductionConnection and Main Settings 1-17Specifying the Network SettingsYou can automatically or manually set the IP address of the machine.No
1-18 Connection and Main SettingsPress [Obtain IP address].6 Select [ON] and press [Enter].7 Manually Setting the IP Address Disable DHCP, and man
1Regulatory information iiiof the receiving business or other entity, or other individual sending the message and the telephone number of the sendi
1IntroductionConnection and Main Settings 1-19Press [IP Address].8 Enter the IP address, and press [Enter].9 Press [Subnet Mask].10 Enter the Subne
1-20 Power Switch and Energy Save ModePower Switch and Energy Save ModeThe machine has three power-related switches; the main power switch, the pow
1IntroductionPower Switch and Energy Save Mode 1-21 Turning the Power OFFTurn the main power OFF when not using the machine for an extended period
1-22 Power Switch and Energy Save Mode<Energy Save> and Energy Save ModeWhen the machine has been idle for a long period of time, the energy
1IntroductionLoading Paper 1-23Loading PaperAcceptable PaperPaper cassettePaper type Paper size QuantityPlain paper(weight: 20-24 lbs.)Letter, Lega
1-24 Loading PaperItems to AvoidTo prevent jams and damage to your machine, do not use the following:Creased paper• Wrinkled paper• Folded paper• C
1IntroductionLoading Paper 1-25Cautions When Loading PaperIf the paper is curled, stretch the paper into shape before loading it.• When• you inse
1-26 Loading PaperLoading Paper into the Paper CassettesPull the handle to open the paper cassette.1 Press down the paper lifting plate until it lo
1IntroductionLoading Paper 1-27Pinch the side paper guide and adjust to the width of the stack.5 Close the paper cassette.6 Set the paper size.7 Se
1-28 Loading PaperLoading Paper into the Bypass TrayWhen you need to use a paper size that is not currently loaded in the paper cassette, or when y
iv Regulatory informationQuadAccess® QuadAccess is a more powerful version of what already is a pretty powerful feature, called dual access. Whil
1IntroductionLoading Paper 1-291) Adjust the paper guides to fit the paper, 2) then lower the flapper release 3 lever.Set the paper size.4 See “Setti
1-30 Loading PaperSelect the paper cassette you want to set.3 [Cassette 2] appears only when the optional • 500-sheet 2nd cassette has been instal
1IntroductionLoading Documents 1-31Loading DocumentsBe sure to read the following guidelines before you begin faxing, copying or scanning.Acceptabl
1-32 Loading DocumentsScanning AreaThe scanned area is shown below.LetterA4Fax : Letter 8.4 in. (214 mm)/A4 8.2 in. (208 mm)Copy, Scan : Letter 8.
1IntroductionLoading Documents 1-33NoteBe sure any correction fluid, ink, or stamps on the document are completely dry • before loading.Remove all m
1-34 Loading DocumentsNoteBe sure any correction fluid, ink, or stamps on the document are completely dry • before loading.Be sure that the ADF is e
Chapter 2Operating the MachineMaking Copies ...
2-2 Making CopiesMaking CopiesThis section describes the basic procedure for making copies. For the detailed procedure, see the Copier Guide.Basic
12Operating the MachineMaking Copies 2-3Duplex CopyingYou can use this function to perform:• One-sided copying of a duplex document (2 1sided) •
2-4 Making CopiesSelect the copying method.3 Select [Long Edge] or [Short Edge], and press [Enter]4 .Refer to the description on the next page to s
1Limited warranty vLimited warrantyThis warranty is made by Muratec America, Inc. (hereafter referred to as “Muratec”). This warranty is valid only
12Operating the MachineMaking Copies 2-5NoteRefer to the following table when selecting the binding position.Binding position ImageLong EdgeShort E
2-6 Making CopiesCombineYou can copy a two page or four page document onto a single page.Scan SizeYou can erase the black shadows that appear when
12Operating the MachineScanning 2-7ScanningThis section describes the basic procedure for performing scanning. For details on other operations, see
2-8 ScanningPress [Mail Address].3 Enter the e-mail address, and press [Enter].4 Up to 50 characters can be entered for an e-mail address.Press <
12Operating the MachineScanning 2-9Using the Address Book for Transmission Load the document, and press <Scan>.1 For details on loading docu
2-10 ScanningManually Specifying a Folder Load the document, and press <Scan>.1 For details on loading documents, refer to “Loading Document
12Operating the MachineScanning 2-11Specify the shared folder to save the data to, and press [Enter].4 Press [Root] to return to the list of comput
2-12 ScanningScanning to an FTP ServerYou can scan a document to a specific folder on an FTP (File Transfer Protocol) server.FTP ServerNetworkManual
12Operating the MachineScanning 2-13Press [Host].3 Press [Link].4 Enter the link to the FTP server, and press [Enter].5 Start the link with two sla
2-14 ScanningEnter the user name, and press [Enter].7 Press [Password].8 Enter the password, and press [Enter].9 Press [Enter].10 Press <Start&g
vi Limited warrantyrequirements.4. Muratec will not be required to make adjustments, repairs or replacements if the product is installed or used a
12Operating the MachineScanning 2-15Specify the FTP shortcut.3 If you loaded the document in the ADF, this concludes the procedure.• If you loaded
2-16 ScanningLoad the document, and press <Scan>.1 For details on loading documents, refer to “Loading Documents”. (See page 1-31.)Press the
12Operating the MachineScanning 2-17Introduction to Advanced FunctionsThis product includes the following scan functions.ResolutionYou can set the
2-18 ScanningScan Path NotificationYou can receive an e-mail regarding the location that the scanned document was saved to.Document CategoryYou can
12Operating the MachineTransmitting Faxes 2-19Transmitting FaxesThis section describes the basic procedure for transmitting faxes. For details on o
2-20 Transmitting FaxesPress <Start>.4 If you loaded the document in the ADF, this concludes the procedure.• If you loaded the document on th
12Operating the MachineTransmitting Faxes 2-21Canceling Faxes This section describes the procedure for canceling faxes that are being transmitted.
2-22 Transmitting FaxesTransmitting PC FaxesThis machine features two methods of PC faxing:This section describes the procedure for transmitting a
12Operating the MachineTransmitting Faxes 2-23Select “Muratec Fax” as the printer.3 Click [Preferences] to open the detailed settings screen.4 Clic
2-24 Transmitting FaxesClick the [Fax Settings] tab.6 If it is necessary to change the user information, click [Select User...] and select 7 the us
1How to Read This Manual viiHow to Read This ManualSymbols Operational and Safety InformationIn this manual, the following symbols are used with t
12Operating the MachineTransmitting Faxes 2-25Enter the fax number in the “Fax Destination” entry box, and click [FAX].11 Pauses and other dialing
2-26 Transmitting FaxesIntroduction to Advanced FunctionsThis product includes the following fax functions. For details, refer to the Scanner and F
12Operating the MachineTransmitting Faxes 2-27Closed TransmissionWhen closed communication is set, fax messages cannot be transmitted and received
2-28 Transmitting FaxesOfframp TransmissionIf you transmit an e-mail to the machine, you can transmit the mail text and attached file via fax.
12Operating the MachinePrinting 2-29PrintingThis section describes the basic procedure for printing. For the detailed procedure, see the Printer Gu
2-30 PrintingSpecify each setting, and click [OK].4 Execute a print command in the application software.5 Introduction to Advanced FunctionsThis pr
3-1Chapter 3RegistrationRegistering Destinations ...3-2Reg
3-2 Registering DestinationsRegistering DestinationsTo use the address book or speed-dial, it is necessary to register a destination in the Address
123RegistrationRegistering Destinations 3-3Press a new button.5 Enter the name, and press [Enter].6 Up to 30 characters can be entered.Press [Fax N
3-4 Registering DestinationsUse the numeric keys to enter the fax number, and press [Enter].8 You can also register dialing options if you wish.• U
viii How to Read This ManualAbout symbol symbol indicates the direction of the document.When the document has a length longer than its width, we
123RegistrationRegistering Destinations 3-5Use the numeric keys to enter the PIN, and press [Enter].14 Press [Enter].15 To continue to register add
3-6 Registering Folder ShortcutsRegistering Folder ShortcutsUp to 300 frequently used shared folders can be registered as shortcuts.NoteBe sure tha
123RegistrationRegistering Folder Shortcuts 3-7Press [Shortcut Name].5 If you do not want to register the shortcut name, proceed to step 7.Register
3-8 Registering Folder ShortcutsEnter the user name, and press [Enter].10 Up to 64 characters can be entered.Press [Password].11 Enter the password
123RegistrationList of Settings 3-9List of SettingsIf you press <Setting> on the control panel, the settings screen is displayed. On this scr
3-10 List of SettingsFTP ShortcutYou can register, edit, and delete shortcuts to FTP servers.Refer to Chapter 7, “Registering Destinations” in the
123RegistrationList of Settings 3-11[Default Settings] ScreenThe default values are those used when you press <Reset> to return to the ready
3-12 List of SettingsSound SettingsYou can set the various sound settings.Refer to Chapter 1, “Specifying Default Settings” in the Administrator&a
123RegistrationList of Settings 3-13Network SettingsYou can specify the network settings for using the OfficeBridge and transmitting Internet Faxes.
3-14 List of Settings[Paper Settings] ScreenYou can make paper settings for receiving faxes and making copies. You can also insert different paper
Related products and manuals for Printers Muratec MFX-2550
 (198 pages)
(2 pages)
(142 pages)
(165 pages)
(150 pages)
(198 pages)
(2 pages)
(142 pages)
(165 pages)
(150 pages)
© 2020, manymanuals.com. All rights reserved. | 1.742 s |
 Manymanuals.com
 Manymanuals.de
 Manymanuals.fr
 Manymanuals.it
 Manymanuals.pl
 Manymanuals.cz
 Manymanuals.es
 Manymanuals-pt.com
Comments to this Manuals